
How we did it: Shiplap Shower

All photos by Dandelion Dreams Photography
THE PROJECT:
Last April I was invited by a repeat client (that means she pretty much already trusts me) to remodel her master bath in her 1929 Kensington home they had just purchased. After reviewing the space, we knew we needed to update this space, make it lighter and brighter, because of the size, and open up the walls. She wanted to keep some of the Spanish influence, as it’s a historical home, keep some character, but add more modern finishes.
THE RESEARCH:
As the design came together, I had researched Shiplap showers and devoured this blog by Flipping Wendy, she did a nice job of laying out her approach. She writes:
"I decided to use a material called AZEK. It's a material usually used on exteriors so I knew it could hold up. Just to make sure, I called AZEK to see what their thoughts were on using their trim boards in the shower. It was funny because the first person I spoke to said, 'Hmmm. That's a good question. We've never had anyone use it in that manner. But, I don't see why it wouldn't work." He then asked someone else in the office. I could then hear a bunch of them discussing how nobody had ever asked that but they thought it was cool and didn't see why it wouldn't work. I was confident this was the right product to use.'"
As a general contractor myself, I knew my team may look at me sideways, but they couldn’t say no, they just had to figure out “how”. I was a dog with a bone, I knew I wanted to do this, and I had a client that KNEW I would give it 110%.

Images from Azek.com
THE PROCESS:
Step 1: Demo
a.k.a. the best part, rip and tear. This is where we get down to the bones of the space, and can start to see its real potential.


Step 2: Waterproofing
I turned to “My two Mike’s” (well, one is Mike and one is Michael). Michael and Mike worked together to present a plan. So, here’s how it went down.
Me: “Hey Michael (plumbing, electrical, drywall framing all around right hand person) how did you water proof the walls again?” (sends me this photo and says,”You REALLY have to waterproof the walls)


Step 3: Installation
Me: “Hey Mike, how was that install? How EXACTLY did you do that again?”
Mike: “So, the install of the Azek began with the absolute wall prep that was waterproofed. By that I mean, that area of the shower wall would repel all water with or without the decorative Azek being installed. The Azek material is a completely water proof PVC material, and only needs to be installed so that it doesn't fall off. Since the shower cavity is already water tight, the Azek is laid on from the bottom of the shower up. An excellent water proof adhesive that sticks to PVC and the wall is used. I used a 23 gage finish pin to hold the planks in place, shooting them in on the top ledge of the material and using 1/4" spacers on the bottom to maintain the "groove " between the PVC boards. Also, and this was very important for me, I ran a continuous seam of high quality waterproof caulking on top of every row of boards as I put them up (to prevent water from seeping behind). That caulking cannot be silicon because silicon does not accept paint very well. The pieces of Azek that need to be seamed together on the edges, a clear PVC adhesive was used.
This is the method I used. Key to all of this is the wall being totally watertight prior to the shiplap going up. Since the Azek is not typical shiplap the install is more difficult. (Real shiplap lays over one another thus shedding water as it runs down). This stuff is just 3/4"thick by about 7"wide with no lip, that's why all the care to caulk and seal each piece. (you don't want water seeping behind the shiplap and the wall where it could stand and not dry out........mold).”
Step 4: Paint
The last step I took was to have my painter go in and paint the whole bathroom shiplap in a marine paint, in the color snowbound. Even though the product is pre-finished, the installation will ding, and get scuffed and needs a fresh coat of paint.


THE DESIGN ELEMENTS:
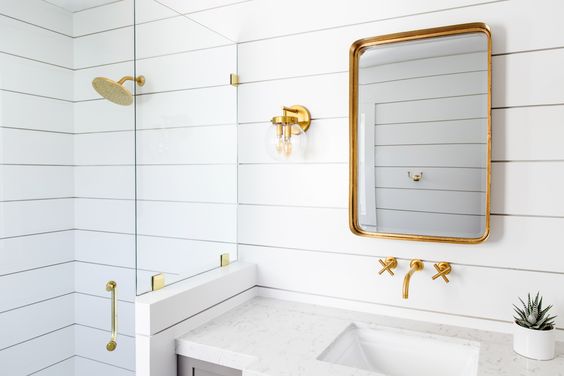
Now for the fun stuff! We complicated things a bit more by putting the plumbing in a wall mount, a few sconces wired up and an angled shower door. We relocated the commode and added a sliding barn door. I chose a warm gray paint for the custom vanity, Dovetail by Sherwin Williams, a remnant quartz countertop, GORGEOUS Schaub and Company glass knobs with gold, and one of the prettiest features, a graphic spanish style floor tile.
All in all, we chewed a few fingernails, we made multiple trips down for site visits and the team pulled off a great looking space. In 5 years I’ll circle back to let you know how it all held up. I’m thinking well.
THE FINAL PRODUCT:


What to Expect
Tile Installation Guide
Being creative means making mistakes...
The key is figuring out which mistakes to keep. For our shiplap bathroom, I had a fear that the long-term durability would be compromised so I had my clients early on the sign a waiver saying that we were using AZEK off-label and I would not be responsible financially if they decided to use this in the shower. Now, almost 1 year later, I see what I would have done differently. I would have silicone gelled between grooves. I would have also hired a boat marine painter to prime and paint the shiplap in lieu of using a house painter and marine paint. Making these changes should allow the product more durability. Hind sight is 20/20, but how fortunate are we to have a way to fix things. All problems should be this straightforward.